Pages

Thursday 29 May 2014

Building a survival shelter

In modern hiking we have so much technology to make our journey safer, lighter, and more comfortable, to protect us from the elements and even nature itself (dirt, bugs, animals etc).  But what if you didn't have your tent, your sleeping bag, and your fancy stove, would you be able to survive in the wild?

The ability to use the bare basics at your disposal to turn the odds of survival in your favour is the ultimate challenge. Television shows like Man vs. Wild and Dual Survival have been incredibly successful by appealing to this primitive drive. As a fellow wilderness survival fan, my brother-in-law Pete and I decided to set ourselves a survival challenge and build and sleep in our own forest shelter. So one Saturday morning in the middle of winter, with the blessings of our respective wives, we set out for a drive through the Yarra Valley and across the Black Spur in search of a suitable site.


It was probably 30-minutes into our drive that Pete casually mentioned he had left his tent at home. My immediate thought was that we would need to turn back but that’s when Pete told me he had intentionally left it behind to lend more reality to the survival situation. I was less than impressed at the possibillity of having to share my one-man bivvy with another wet and bedraggled man but nevertheless we continued on sans tent.

Having earlier pored over maps to find a suitable area, we knew exactly where we wanted to be, so we set out at a good pace and after an hour, and a few u-turns, we diverged off the 4X4 track into the forest. The lightly misting rain left a sheen on the foliage of the gum trees, ferns and bracken, leaving them green and glistening.


By the time we had decided on the site to use, it was early afternoon. It was continuously raining, so the need to build a feasible shelter before dark made us  skip lunch and work quickly to collect all the materials we needed.


The frame we constructed was a basic leaning roof with a raised floor. We created the floor by using branches resting on the upper slope and then bracing them to the frame, making it dry and safe from water. Everything was tied together with small strands of separated nylon rope.


We collected large quantities of foliage to insulate and seal the roof and floor and then found pieces of stringy bark to place on the surface of the roof as makeshift tiles to shed the rain. It rained continuously and we had to work hard because the shelter was too large and took a lot of work to adequately cover.

Clarifying sleeping arrangements: "Don't even think about sleeping next to me you wet smelly man!"


As darkness threatened we put the finishing touches on the bedding and went in search of firewood. Everything was sodden. From past experience we knew what to expect from temperate rainforest and searched at the base of large trees for partially dry kindling. I started to build the fire and coax it to life while Pete continued the search for wood.


Once the fire was going, we surrounded it with the wet timber so that it could begin to dry off in the heat. Finally, it was time for something to eat! Pete proceeded to eat a whole stick of salami by itself. You would think the hunger had made him desperate but he actually does this anyway. We then cooked food on the fire and rested our sore feet as the last light disappeared and the stars began to appear.

After a satisfying hot meal we set back and yarned about our day. It wasn’t long before the eyelids started to droop and it was off to bed in our makeshift shelter. As if to test our resolve, the rain set in strongly. A small amount of rain dripped through the shelter overnight, just the occasional drip on the face but it wasn’t enough to actually make me wet. I slept really well.

When I awoke, it was dim morning light, the fire had gone out and the landscape was blanketed in fog.  It was a beautiful sight to see the lush green ferns and the dark trees looming out of the whiteness. Over a hot breakfast we chatted about the success of our shelter and the things we would do differently if we had to build a survival shelter again. We agreed, the roof was far too high and on too steep an angle resulting in a lot of extra energy spent thatching and waterproofing it. It had also been a mistake to build the shelter downhill from the fire meaning that the heat didn't effectively warm the area of the sleeping platform. It would have been better to situate the shelter higher than the fire so that the warmth would rise and fill the shelter. But overall we had been dry, sheltered from the wind, and relatively warm. All things considered, we counted our first survival shelter a raging success!

To learn more about making your own survival shelter check out this article from Field and Stream:


Choosing a knife for hiking


The knife is one of the oldest tools known to man. Thousands of years ago, primitive man used shards of obsidian or flint to create edged tools for cutting. It's one of the things that sets us apart from the animals. In fact, some would say that a man without a knife is really just a monkey. Needless to say, every man (and woman) needs a knife.

A knife is one of the few items that features on every essential gear list for hiking or camping and there is a good reason for this. A knife is an incredibly versatile tool that can be used for a variety of tasks, including:

  •  Food preparation
  • As a utensil
  • Chopping firewood
  • Clearing the campsite
  • Fashioning other tools
  • Building a shelter
  • Cutting things – rope, vines, branches, etc  (it’s amazing how hard this is without a knife).
  • Prying things
  • Opening things (cans, packages, etc)


 So now we've established you need a knife for hiking, the real question is which knife?

Fixed blade, folding knife, or multi-tool?

Let’s get this out of the way first – there is no ‘best knife’ for hiking.  Your choice depends on your preferences, the environment you are traversing, and the local laws and regulations on carrying knives. The best knife is always the one you have with you, not the one sitting at home. Each style of knife has it’s pros and cons. That said, there are some important considerations in choosing your knife that go beyond preference and will ensure that you choose a reliable piece of equipment that will serve you well for many years.


A folding knife  is smaller, lightweight and can be placed in your pocket and so you are most likely to have it with you when you need it. It has limitations because of its size, as it cannot be used for tasks like clearing scrub, chopping wood etc. It is also more prone to breaking as it has a thinner blade and moving parts and could fail under pressure.


A multi-tool offers a range of tools, including knives, saws, scissors, screw drivers, can openers, tweezers and just about anything you can imagine. They tend to be somewhat heavier than folding knives but are relatively lightweight have the same limitations of strength and blade size.

A fixed blade knife is strong, tends to have a larger blade, is capable of heavy duty tasks like chopping and prying and is more comfortable to use for longer periods of time because you can grip it easily. It is likely to endure a lot of mistreatment and keep on performing, meaning that you can rely on it when you need it most. The downside, it’s a bit heavier to lug around.

Personally I like all of these options for different scenarios and would recommend that you have at least one of each to try out and decide which best suits your purpose. But if I had to choose just one knife to stake my life on, it would be a fixed blade knife. When Aron Ralston of 127 Hour fame had to make the agonising decision to cut off his arm to escape, all he had was a cheap, blunt, multi-tool. Ouch. Don’t be that guy. Overall the fixed blade knife will accomplish most tasks and is the more reliable should you find that your life depends on it. So let's have a look at how to choose a good fixed blade knife.

What to look for in a fixed blade knife

Full Tang Construction

The tang, is the part of the blade steel that extends into the handle of the knife. Many knives are made with partial tangs, in which only a portion of steel continues into the handle. Obviously this saves on cost for manufacturers but it is at the expense of the strength and durability of the knife. A full tang is illustrated here and makes for an extremely sturdy construction. Even if the handle material breaks you still have a usable tool.


The Size

Gerber Bear Grylls Ultimate Survival Knife with firesteel
The optimum sized blade that can tackle batoning, chopping, slicing, and finer bushcraft tasks is between 4 1/2-6 inches (blade only) for a total length of 9-11 inches length. You also want to consider the thickness of the steel as this is what will determine how much abuse the knife can take before cracking or bending. If you are an ultralight hiking fanatic, you may be willing to sacrifice some functionality in your bladeware to keep your pack weight to a minimum. On the other hand, maybe you should use your man-sized chopper to carve off the weight somewhere else!


The Steel

ESEE Izula
There are so many different steels to choose from but in the end it boils down to buying a knife from a trustworthy bladesmith that comes with a good warranty. You want to consider stainless steel if you are in areas of high humidity, or are working in or around water often. Stainless steel can still rust, but it will resist corrosion and require less frequent care. High-carbon steel is commonly used in tool making and is more durable and tends to hold a better edge. The downside is, just looking at it causes it to rust. Some knife manufacturers have developed corrosion resistant coatings which help protect the blade. ESEE Knives applies an Epoxy coating to their knives which works really well and gives the knife a unique and appealing look.


The Sheath

ESEE 5 sheath with Molle backing and pouch attachment
Your knife will live in the sheath most of the time. The sheath needs to be of a sturdy construction so that it won’t drop your knife out in the wild. It needs to be easily accessible and comfortable so that you aren't chafed and bruised after wearing it. You will want to consider how high the sheath rides on your belt, as this can vary considerably and can be very uncomfortable.  Does the sheath have Molle or Alice compatibility for attachment to webbing or a pack strap? Buying a custom sheath can be
expensive so it’s worth doing your research
 to find a good one first off.


The Handle

Gerber ASEK
The handle should be comfortable to grip and use for long periods without forming hot-spots that cause blisters. It should also have a lanyard hole. A lanyard is essential for using the knife for chopping. Some knives have a handle that features a glass breaker or hammer pommel which can be useful.


Conclusion

Now you're armed with the knowledge you need to choose a great knife for hiking and make the transition from a mere monkey to a real man. Choose a tried and tested knife from a reputable maker and you won't go wrong. The internet is also full of reviews and product tests that can make you an expert overnight. (Please note: If you are a monkey, following this advice may not actually change your species but good job on the reading skills!).

Here are some of the knives that I have and use. I have no affiliation with these companies I just think they make great products. . 


 ESEE 5


A Survival knife designed by SERE instructors, it has a blade length of 5.25in. and thickness of .25in and is built like a tank. It was designed to enable a downed pilot to cut his way out of an aircraft hull and when you hold this weighty hunk of metal you can believe it. It’s a full tang construction forged out of 1095 High Carbon steel, sabre ground for strength and epoxy coated to protect it from rusting. The handles are made from micarta, which consists of layers of compressed linen or canvass infused with an epoxy resin. The ESEE warranty is simple: If you break it, they replace it. It is the best warranty out there. The knife comes with a top notch Kydex sheath that has the option of Molle backing and a utility pouch.

ESEE 4
This is a bushcraft knife with a 3/16 in. thick, 4-inch long, flat ground blade. It's a full tang construction and features removable handle slabs of canvas or linen micarta or the orange G10. Made from epoxy coated 1095 high carbon steel it is an excellent size and weight for most camping chores. It slices well and has a finger groove cut into the blade to allow the user to grip the knife closely for finer tasks. You can choose between the plain edge or the partial serrations. The serrations on the ESEE are easy to sharpen and only take up a small portion of the blade. It also comes with a good quality kydex sheath that allows a range of carry positions.


SOG Seal Pup Elite
SOG Seal Pup Elite
This is a tried and tested knife. Made from Aus-8 stainless steel and featuring beautiful craftsmanship, this knife has been a favourite carry for military personnel the world over. It is tough and reliable. Featuring jimping (small ridges) along the spine for extra grip or for notching. The handle is made from a plastic-glass hybrid called Glass Reinforced Nylon which fuses to the handle and is incredibly durable as well as providing ergonomic and slip-proof grip. The knife comes with a choice of sheath;  A Nylon sheath with a utility pouch, or alternatively a water friendly hard Kydex sheath that comes with Molle compatibility.


Monday 19 May 2014

Attempt on the Mount Anne Circuit: (Pt.5) Escape & Lessons learned


We climbed up to the ridgeline, getting wet and fighting numbness in our feet and hands. 

By the time we had made the ridgeline we were somewhat warmed up by our exertions. Driven by a sense of urgency lest it begin to snow or sleet again, we powered on. 


The view back at the Notch from below Mt Anne


It was rather hair raising crossing the boulder field while snow and ice still remained on the surfaces of the stone. Each footstep and handhold was carefully tested but despite our caution, there were a few near misses. 

After what seemed a long time we reached the safety of the other side. 


With the worst behind us we were able to start enjoying the remainder of the hike.


The views were spectacular.


We planned to stop for a hot lunch at the High Camp hut and the thought of this reward put new energy into us. We began to meet some other adventurers making their way up. We exchanged stories and told of our experience of being snowed in, which they were quite surprised by. Apparently the weather report had made no mention of snow!


When we reached High Camp Hut there were some French hikers there. They were only overnighters staying at the hut and were in the slow process of packing their gear. Because it was rather full, we found a sheltered area on a platform behind the hut and made a hot lunch. By the time we had finished, the loft was vacated and we made ourselves comfortable up stairs, sharing a hot drink, snacks and a nip of Absinthe I had brought with me and of course discussing our adventure.


The downwards journey afforded some wonderful views of Lake Pedder and although we were disappointed that the Mountain had defeated us this time, there was the rousing prospect of returning someday to finish what we had started.

Mount Anne hasn't seen the last of us.

Not by a long shot.

Simon, Tim and Pete.


Lessons learned

There were many lessons learned on this hike which we think worth sharing.

1.       Always carry multiple methods to make fire (e.g. Matches, lighter & flint). You never know when one might fail you. Fire is not a commodity but a necessity and potentially a lifesaver. Carry good quality fire steel – the cheap ones don’t work in difficult conditions.
2.       Always put your sleeping bag in a waterproof bag: A wet sleeping bag is not just uncomfortable, but dangerous. If you are stuck in a storm or snowed in with nowhere to go, your sleeping bag is your safety blanket. Literally.
3.       The importance of gloves: Gloves serve many purposes when hiking, camping and climbing and they hardly take up any space. They protect your hands from abrasive surfaces, creepy crawlies, they insulate against heat and cold and they can provide added grip in certain situations.
4.       Merino thermals are worth their weight in gold: If it hadn’t been for the light merino undershirt and leggings, I would have been extremely uncomfortable and potentially hypothermic. If you are hiking in winter (or in Tasmania) these are a must.
5.       Alcohol Stoves: Alcohol stoves are great in moderate conditions but alcohol does not light well when it is cold and windy. It simply does not evaporate enough to become flammable. I great tip that my doctor passed on to me, is to carry a flask of fuel next to your body which will keep it warm and make it easy to light.
6.       Bring your phone. If you don’t – you will want it.

Attempt on the Mount Anne Circuit: (Pt.4) Snowed In


I was awoken by a startled voice calling out

“Boys, look outside!”

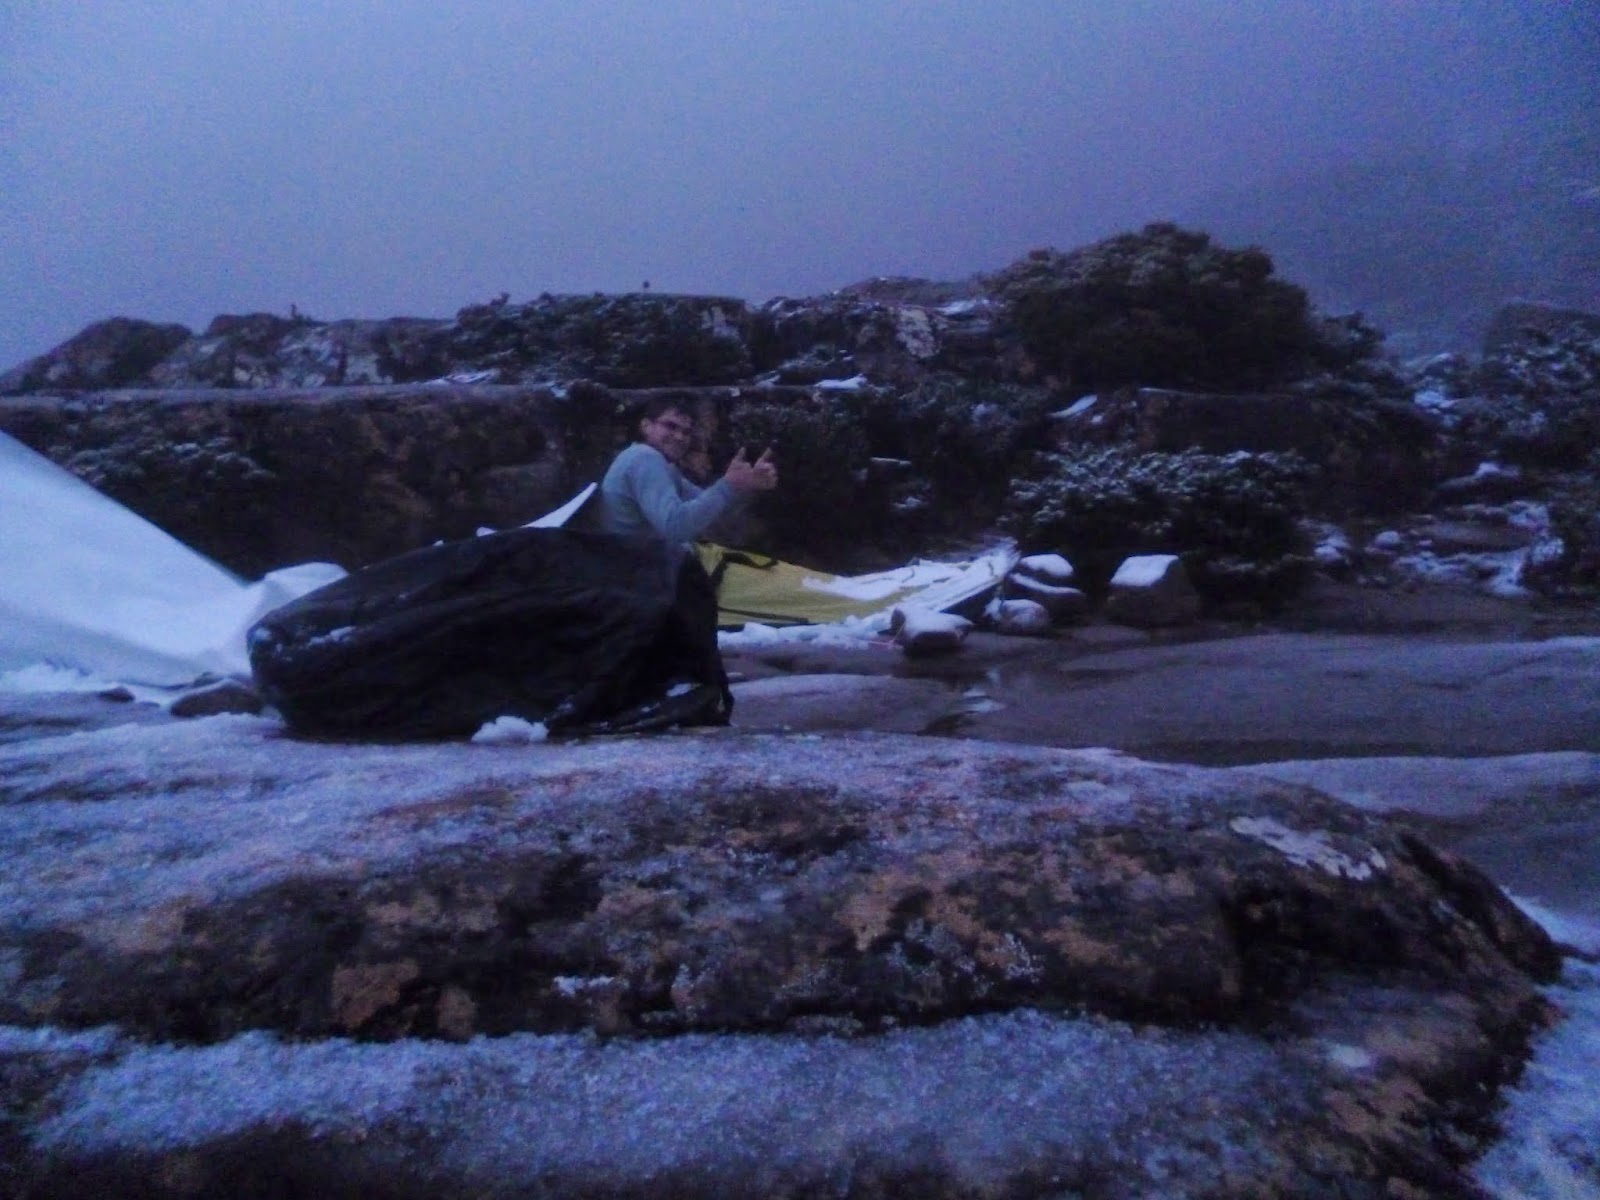
As I unzipped the flap on my bivvy, a white and foreign world came into view. Everything was covered in snow. The puddles of water had turned to ice and a low fog hung eerily across the landscape obscuring most of our surroundings from view.


At first I was in disbelief but this was rapidly replaced with concern. We were not prepared for snow and there would be no chance of getting off the shelf until the snow melted. At this point I uttered something emphatic.


I got up and put on my frozen shoes to attend to urgent business. The air was frigid and my fingers instantly began to numb. I cautiously walked towards the edge of the shelf, unzipped and then began to gracefully slide off the mountain. I instinctively dropped spreadeagle and clutched at anything I could reach. Fortunately some small shrubs halted my fall and I was able to scramble back up and gingerly make my way back to the tent nursing my injured pride.


Yelling between our tents and over the wind we agreed to remain in our tents until the snow began to melt. As if nature was mocking our plans, it then began to snow, sleet, and hail. By now I was beginning to get quite worried. The inside of my tent was full of condensation, my sleeping bag was beginning to get wet and wasn’t providing effective insulation and we had no way of contacting the outside world. One fact that all the reviews agreed upon was the impossibility of climbing the Notch in wet or icy conditions. 


Even if the snow melted and we somehow managed to negotiate the Notch successfully, all our gear was wet and if the foul weather continued there would be no way of drying it. If one of us became injured in the slippery conditions, or started to become hypothermic, we had few options to create heat and the difficulties in lighting our stoves was still fresh in my mind. The remoteness of our location meant that there was no chance of contact with the outside world. I began to pray that we would have an opportunity today to make good our escape.


I woke up to hear one of the boys excitedly announce that the snow was melting and the fog was beginning to lift. It was 10am, meaning that we had been in our tents for nearly 16 hours. We jumped to and quickly packed our tents and equipment away. Tim was having trouble with his fingers and hands becoming numb in the cold. Pete and I had basic gloves that seemed to prevent us losing sensation, so we were able to help out with a few things.


My shoes were full of snow and ice. I knocked out what I could and then devised a plan to put on my dry socks, cover these with plastic bags, and then put on my wet pair. This appeared to work well, keeping my feet dry and warm and adding an extra layer of insulation and grip inside the shoe.

Finally we set out to climb back up to the ridgeline below Mount Anne. 


By now the fog had lifted and the now snow-tipped peak loomed up ahead of us. It was a wet and cold hike but hauntingly beautiful with the melting snow ornamenting the plants and trees.

It was time to make good our escape!


Attempt on the Mount Anne Circuit: (Pt.3) Extreme Weather at Shelf Camp


It was a steep descent to Shelf Camp,
through dwarfed trees and unusual vegetation that appeared almost tropical in its lush foliage.

As we arrived at the Shelf, the rain and wind was now uncomfortably cold and persistent and the idea of trying to set up bivvies and sleeping bags in these conditions seemed foolish. We were confident the weather would clear and so we agreed to climb up towards the cliff face to seek shelter from the driving wind. It was a tough climb, clambering over sharp and slippery boulders with numbing fingers.


When we reached the face, there was no relief and no reward as we found it impossible to find any shelter. The best we could do was to press ourselves against a nook alongside a waterfall and pull our hoods tight.


Eventually the rain slowed and we decided to take the opportunity to make our way back down and begin setting up camp. Tim found that water had leaked into his sleeping bag 
because he had forgotten to put a garbage bag over it, but fortunately it wasn’t too bad. Tim also discovered a decent rip in his shorts which left him pretty exposed. The comic relief was much needed. His face looked pretty battered too.

The tents went up quickly, although there was no way of using tent pegs because of the rock surface.The only way to secure the tent lines was to attach them to rocks. It was quite exposed to the wind and we had all read stories of other hikers losing their tents over the side in the gale-force gusts. I think we all overcompensated by choosing particularly large rocks.


No sooner was the job done, than the wind began to live up to its reputation. It blew. Hard.

By now we were losing hope of the weather clearing today. It was only 4:30pm but compelled by the cold the decision was made to prepare an early hot dinner and retire to our bivvies in the small hope that it would blow over.


Each of us had homemade alcohol stoves – lightweight and effective – at least they were effective in normal conditions. It quickly became apparent that these were not normal conditions. The combination of strong wind and cold made it virtually impossible to light the alcohol or to keep it alight once lit. If you have ever used one of these devices, you know that the stove only begins to operate effectively once it reaches a critical temperature.  Another mistake we had made, which makes me cringe with embarrassment to admit, was that we each had only brought fire steels.

 Pete and I had packed cigarette lighters and matches, but had realised only the day before our flight that we were not permitted to have these even in our checked luggage and we had neglected to purchase any on our arrival. This is a mistake I will never make again.


It took painstaking effort to continue lighting and re-lighting the stove whilst crouching over it to shield the flames from the gusting wind. I began to feel a creeping doubt, a horrible nagging doubt that I might not be able to get this to work. But Pete, good ol' law-breaking Pete, found that he had a box of matches somewhere in his pack after all and with the help of these matches and another 30 minutes or more I was able to get my Mac & Cheese cooked. Pete and Tim had also been successful and were already in their cosy sleeping bags tucking in to some hot food. I quickly did the same and I must say the Mac & Cheese was the best I have ever had.


The weather was unrelenting, and although it was still very light outside we had no option but to bunker down and try to occupy ourselves. I began sorting out the gear in my tent, preparing and organising things. There is only so much organising you can do in such a small tent, and as the wind had only got stronger and the rain was setting in for the evening, I slept fitfully. I was warm enough but the wind was battering our tents and the howling of the wind and the drumming of the rain woke me frequently.

It was a long night.


Sunday 18 May 2014

Attempt on the Mount Anne Circuit: (Pt.2) The Beginning of the Adventure

The beginning of the adventure

We left early on the Friday morning and had an uneventful flight over the Tasman and landed in lush green Hobart. Tim met us at the airport, and after some very manly backslapping, we set off in high spirits for the drive to Mount Anne. Hobart is a quaint little city – a mixture of modern, industrial and historical buildings which the road quickly left behind as we drove out into beautiful farmland. I noticed that the countryside had a distinctly Tasmanian feel to it – something more green, fresh, and timeless. It was surprising how quickly the sense of remoteness crept in to the scenery, as roads pushed through dark forests with no driveways or side roads for mile upon mile and then opened out into valleys surrounded by mountains as far as the eye could see.

After a few hours we were close to our destination. We turned off onto Scott's Peak Road and descended the gravel road where tall rainforest eventually opened out into marshland with Lonely Mountain coming into view. As we arrived at the car park, there were a few small cars there – possibly rental cars by their appearance. It was lightly misting with rain and some ominous clouds were hovering about but nothing could dampen our enthusiasm as we put on our packs. Besides, the weather forecast had warned us to expect “rain clearing in the afternoon”.
 Our plan for the first day was to hike up to the hut, where we would have our lunch, and then to continue on towards Mount Anne to set up camp at the Shelf Camp for the first night. The following day we would attempt the summit of Anne and then continue on through the infamous Notch.


We set off across the button grass plains feeling like intrepid explorers. Brave. Strong. Unstoppable. Tim was wearing some rather flimsy nylon shorts that rode fairly high, which gave Pete and me some cause for amusement. I noticed there were rather a lot of large mosquitoes around and I wondered aloud how many mosquitos must die without ever having tasted blood. This apparently gave Tim great cause for mirth. So we were even. Everything was back in balance.


The hike up the mountain was marked with interesting, charming, and beautiful sights wherever the eye wandered. We passed another hiker on the way up, as he came down. He looked in his mid-50s, with burnt brown skin and well-worn clothing. He told us he had hiked the circuit in reverse and was on the home stretch. He looked skywards at the gathering clouds and commented that it was none too soon.
After we passed the hut, a lovely stone building built in memory of a fellow hiker, the trail became steep and involved some scrambling.


The rain had set in too. By the time we had reached
the summit of the first rise, the rain was horizontal and
driving into our faces.

The rain was unrelenting and made surfaces slippery. Crossing the expanse of boulder fields required constant vigilance to avoid stepping into a crevasse. Despite the obstacles we made excellent progress and in the early afternoon we had reached the ridgeline below the Mount Anne summit. We determined that if the weather cleared we might make an attempt on the summit today but in the meantime we would descend to Shelf Camp and set up our bivvies.

Friday 16 May 2014

Attempt on the Mount Anne Circuit: (Pt.1) Planning and Preparation


My cousin and good friend Tim recently moved to Hobart, Tasmania and we had been discussing the need to organise a hiking adventure.  After a lot of research, Tim recommended that we attempt the Mount Anne Circuit in the mountainous wilderness of Tasmania’s South-West wilderness. This circuit is notoriously challenging both for its topography, which is steep, rocky, muddy, and unforgiving, and for its unpredictable and extreme weather changes. Every information guide recommends that the hiker be prepared for any weather conditions, all year round.  I should mention it is also stunningly beautiful. The fact that it was recommended as a 4-5 day hike fit perfectly with our timeline and sealed the deal. We set the date for the Australia Day long weekend and organised to have the Friday off as well to give us a full four days of hiking. It was the height of summer and we expected the weather would be optimal.

For me, a lot of the enjoyment of outdoor adventure is in the planning and anticipation of the event so I immediately set about preparing myself for the challenge.  There were so many considerations for this hike, in terms of gear, food, skill, and physical preparedness. There was the challenge of extreme weather conditions, then the challenge of rock climbing, and the length of the hike (carrying sufficient food and water).
Due to the challenging terrain, we decided to take the minimalist approach to hiking gear and go ‘lightweight’. This entails only taking the minimum of necessary items, and forgoing the luxuries (or most of them).  The theory is that with minimal pack-weight you are free to just enjoy the experience of the hike rather than sweating and groaning under a heavy load. The first step to going lightweight was to begin weighing all my equipment, and tallying up the total weight of my pack. A quick Google search will show you that lightweight hikers go crazy for weighing everything and cutting weight wherever possible, even to the point of trimming excess length from bootlaces or pack straps. I must admit it is addictive once you get started. 

One of the key principles of lightweight hiking is that you should only bring items that serve multiple purposes. For example; A knife can be used for repairs, camp fire preparation, preparing and eating meals, cutting rope, prying or opening things; there is no need to bring a fork and spoon when you can use a Spork that does both etc.  With regard to clothing, the lightweight mantra is “layer”.  This means thinking about each item of clothing as one layer in a system of layers. For example, instead of bringing a really warm jacket that you can only use in sub-arctic temperatures and makes you sweat like a strung-out junkie the moment you move, you bring several layers (a merino under layer, a shirt, a merino mid-layer and a shell rain-jacket). The combination of layers supplies the same warmth, but is much more versatile, and can be varied for many conditions. A good test to layering is that you should be able to wear all the clothing you bring at the same time. This phase of the planning took a lot of forethought and some difficult decision making. A particular struggle for me was the decision to bring a lightweight knife rather than one of my favourite, heavy duty ones. You need to be ruthless.

I also meticulously organised my meals for each day of the trip. I estimated how many calories I required each day and then began to sort out all meals, including snacks, based on a high caloric diet to give Maximum energy for minimum weight. To complete the process, I sealed each day’s food in separate Ziplocs to make it easy to know what food to eat each day during the hike.

I also acquired some new items, including a pack, some lightweight trail runners, and a new cooking pot but I'll post about these later. 

The preparation was done and now it was time for the adventure!

Wednesday 14 May 2014

Turning a camping memento into a knife


This was my first survival bushcraft knife from ESEE Knives. I love survival knives and decided I wanted to buy the best - something unbreakable. After a lot of research over the internet, I decided on the ESEE 4. ESEE have the best guarantee on their products you will ever find. Break it and they replace it. No questions asked. I fell in love with it and soon placed my order to ship one over from the US through theknifeconnection.com. I had planned on getting the desert tan colour but made a rookie mistake on the order code and got the jungle green with orange G10 scales. I loved the knife, but the orange look wasn't quite what I wanted.

The scales are easily replacable, and so I started to research alternative scales (eg handles). I discovered a number of forums on which people were personalising their ESEE knives in all kinds of clever ways and so I was inspired to create my own personalised knife .


A year earlier, I went on a 4x4 adventure with my good mate Tim and his brother Pete up through the remote Australian interior. One night we camped in an arid desert surrounded by mesa. Finding wood for a campfire was difficult due to the sparseness of the vegetation, but after some searching we found a standing dead tree and began to chop it up. It was impossibly hard and dense, causing  the axe to ring as if striking iron on iron. It was well seasoned, burning strongly and releasing a lovely aromatic smoke. We cooked lamb chops over the fire and told stories until it was time to curl up in our swags. The whole experience was so memorable, that I decided to take a small piece of the wood back with me as a souvenir of the trip. At the time, I had a vague idea of making something with it but now I knew that it would make the perfect scales for my ESEE!

I had decided to give my knife a complete makeover to go with the new handle and so the process began by convexing the edge of the blade using a piece of foam rubber with different grades of emery paper on top. It was the first time I had done this and I found it rather nerve racking lest I ruin a perfectly good blade. But it worked just fine and with the convexing completed I moved on to phase two.

In the second phase I determined to etch the ESEE logos and serial numbers into the blade. I sourced a powerful etchant from a computer supplies store and began the process. It only took a few hours on each side before I had a distinct and deeply etched logo. The result was fantastic.

I hurriedly applied paint stripper and within minutes had wiped off the green epoxy coating (except on the flat of the handle sections where I left the epoxy to ensure corrosion protection) and revealed a very rough and unfinished steel surface. So it was back to the Emory paper for many hours of painstaking sanding to take back the blade to a mirror finish.

Now to the scales. I had my piece of desert wood, a roughly hewn branch approximately 2 inches in diameter and 8 inches in length. Because it was small so there was no room for error. I carefully chose my first cut straight down the center to create two equal slabs. The wood was exceptionally hard, making progress tediously slow. It also created a fine dust that was particularly irritating to the eyes. I later found out that this is characteristic of this rare tree. After a lot of research, I discovered this wood is probably Purple or Pink Gidgee a rare desert hardwood of the Acacia family that grows in a few remote parts of Australia. It is a perfect wood for turning and has been used in the past to make knife handles! Once the first cut was complete, the wood inside had a lovely reddish heart with a dense grain. I decided this would form the outside of my scales. I then proceeded to make flat slabs by making lengthways cuts along the outer edge of the two pieces I had created. Then I sanded them down perfectly flat so that they would sit flush against the knife handle. Once this was accomplished I used the orange G10 scales to trace the pattern on to my wooden slabs and went about carving them to shape. It took me many hours of cutting, filing and sanding before I finally had my perfect replica scales. I carefully drilled and countersunk holes for the screws and attached them to ensure they worked. A few minor adjustments and a bit more sanding and they were perfect.

To finish the handles I applied a natural wood oil, a mixture of Danish oil and carnuba wax and soaked the scales overnight in a ziploc bag. Then I allowed them to dry, sanded them back with fine emery and repeated. After a few treatments I buffed the scales with a dry cloth for a nice polished finish.

The mirror finish on the blade was too clean-cut for a working knife and 1095 high carbon steel is very easy to stain and rust, so the final step was to put a patina on the blade. I firstly used vinegar and water and heated this on the stove, placing the blade in the mixture. This worked well, producing an even dark patina over the entire surface however, it was not the look I wanted. So after removing some of the coating with fine steel wool I applied some American mustard with a scrunched tissue to create a mottled look. This worked beautifully and I applied two layers for different lengths of time to create light and dark variation. Finally a rinse with water, a polish with a dry cloth, and a layer of oil and the job was done!


This was a great project to learn some new skills and to turn a memento from a great adventure into something I can now use and enjoy.